Every great harvest begins with a well-prepared nursery. The nursery is where plants take their first steps in life, and providing the right care during this stage is essential for healthy growth and strong transplants. In this blog post, we’ll explore different methods of preparing a nursery, irrigating it effectively, and fertigating it to ensure optimal nutrition from sowing to transplanting.
1. Nursery Preparation
The foundation of any nursery lies in proper preparation. Here are the most common methods:
a. Raised Bed Nursery
Raised beds are commonly used for vegetables like tomatoes, peppers, and cucumbers.
• Steps:
1. Select a well-drained site with good sunlight.
2. Clear the area of weeds and debris.
3. Create raised beds 15–20 cm high, 1 meter wide, and of any convenient length, leaving paths between beds.
4. Add 10–15 kg of well-decomposed manure or compost per square meter. Mix thoroughly into the soil to improve fertility.
5. Sterilize the soil using solarization or steaming to kill pathogens.
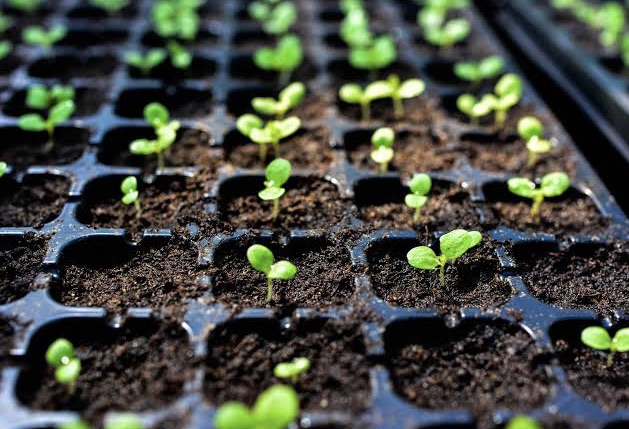
b. Seedling Tray Nursery
This method is ideal for small-scale nurseries or crops requiring careful handling.
• Steps:
1. Use plastic seedling trays with drainage holes.
2. Fill trays with a soilless medium such as cocopeat, vermiculite, or a mix of 40% compost, 40% loam soil, and 20% sand.
3. Incorporate a starter fertilizer like 5 g of NPK 15-15-15 per 10 liters of growing medium to give the seedlings an initial nutrient boost.
4. Sow one seed per hole, cover lightly, and water gently.
c. Flat Bed Nursery
This traditional method works well for hardy crops.
• Steps:
1. Level a flat area and loosen the soil to a depth of 20 cm.
2. Enrich the soil with 10 kg of compost and 100 g of NPK 15-15-15 per square meter.
3. Create shallow furrows and sow seeds at recommended spacing. Cover lightly with soil or mulch to conserve moisture.
Pro Tip: Always select high-quality, disease-free seeds and treat them with fungicides like thiram or bio-control agents to enhance germination and protect against fungal diseases.
2. Irrigation Techniques for Nurseries
Seedlings require consistent moisture but are prone to overwatering. Here are three effective methods:
a. Overhead Sprinklers
• How it Works: Water is sprayed uniformly over the nursery.
• Advantages: Ideal for raised and flat bed nurseries.
• Frequency: Water lightly twice a day (morning and evening) during dry periods.
• Caution: Avoid excessive watering, as this can lead to fungal infections.
b. Drip Irrigation
• How it Works: Water is delivered directly to the root zone using drip lines.
• Advantages: Saves water, prevents waterlogging, and keeps leaves dry, reducing disease risks.
• Frequency: Adjust irrigation to maintain moist soil. Use a moisture meter if available.
c. Manual Watering
• How it Works: Water is applied directly using a watering can or hose.
• Advantages: Simple and affordable for small nurseries.
• Frequency: Water twice daily in hot weather, ensuring gentle application to avoid disturbing seeds.
3. Fertigation for Nurseries
Fertigation ensures seedlings receive nutrients directly through irrigation. Here’s how to fertigate based on different nursery methods:
a. Fertigation for Raised Beds
• Frequency: Fertigate weekly after germination.
• Fertilizer Schedule:
• Week 1–2: Apply NPK 19-19-19 at 2 g per liter of water. Use 2 liters per square meter of nursery bed.
• Week 3–4: Increase to NPK 20-20-20 at 3 g per liter of water.
b. Fertigation for Seedling Trays
• Frequency: Fertigate every 7–10 days.
• Fertilizer Schedule:
• Week 1–2: Dissolve 2 g of NPK 15-15-15 per liter of water and apply 100 ml of solution per tray.
• Week 3–4: Switch to Calcium Nitrate (CaNO3) at 2 g per liter to strengthen seedling stems.
c. Fertigation for Flat Beds
• Frequency: Start fertigation 10 days after germination. Apply every 5–7 days.
• Fertilizer Schedule:
• Week 1–2: Use NPK 10-30-20 at 2 g per liter of water to encourage root development.
• Week 3–4: Transition to NPK 20-20-20 at 3 g per liter of water for balanced growth.
Pro Tip: Always flush the system with clean water after fertigation to prevent clogging in drip or sprinkler systems.
4. Hardening and Preparing for Transplanting
Hardening is crucial to prepare seedlings for field conditions. Follow these steps:
1. Reduce Watering: Gradually reduce watering 5–7 days before transplanting to toughen seedlings.
2. Expose to Sunlight: Slowly expose seedlings to direct sunlight for 2–4 hours daily, increasing the duration over a week.
3. Nutrient Boost: Two days before transplanting, apply a foliar spray of NPK 20-20-20 at 2 g per liter to reduce transplant shock.
4. Inspect Seedlings: Check for pests, diseases, or weak plants and discard unhealthy ones.
Conclusion
By following the outlined methods for nursery preparation, irrigation, and fertigation, you can grow strong, healthy seedlings ready for transplanting. Each step, from soil preparation to fertilizer application, plays a vital role in ensuring your crops have the best start possible.
If you have tried these techniques or have questions, feel free to share them in the comments. Don’t forget to follow Grow With Us Africa for more practical farming tips and success stories!
Grow With Us Africa – Growing Dreams, One Seed at a Time.
Tags: Fertigation Techniques, Fertilizer Quantities, Hardening Seedlings, Irrigation Methods, Nursery Preparation, Organic Farming, Seedling Care, Transplanting